A (very) simple ML workflow for beginners
Simple workflow of ML problem
Below is a very simple workflow in a ML project
(Please note that in practices, for larger ML project, things are very complicated, not just simple like this!!!)
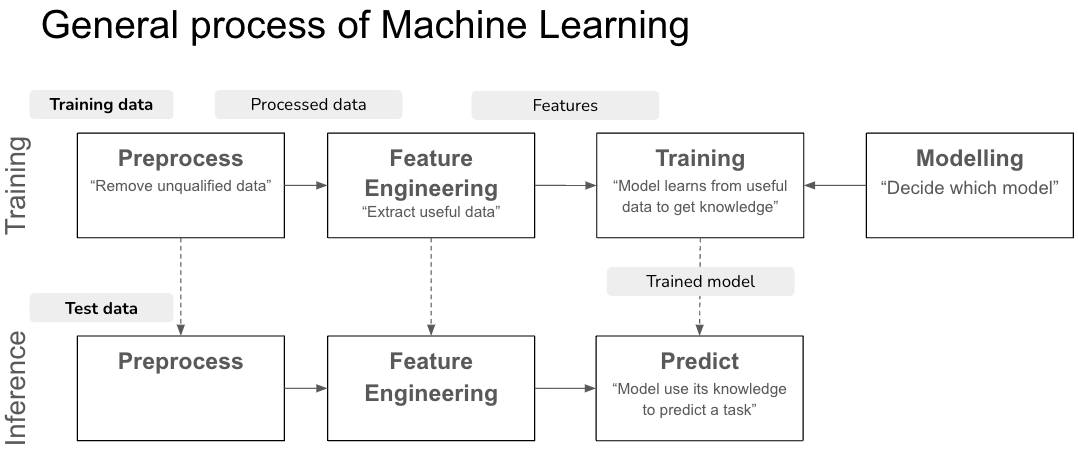
Each step will include serveral “actions”, for example
- Preprocess: fill NaN data, remove noise data
- Feature Engineering: encode text data to numerical data, scale data
- Modelling: set up hyper-parameters, build model
- Training: split data, train model
- Predict: predict the outcome
Each “action” is generalized as a function. As a result, let’s say, for each step, we will have corresponding functions
- Preprocess:
fill_na,remove_noise - Feature Engineering:
encode_data,scale_data - Modelling:
setup_params,build_model - Training:
split_data,train_model - Predict:
predict
From experiment in notebook
In Google Colab (or, JupyterLab), this is something as below codes
# preprocess

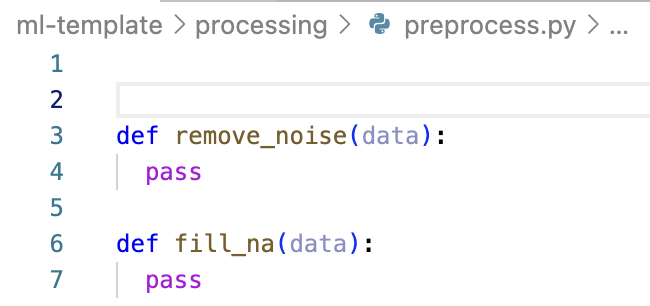
def remove_noise(data):
  pass

def fill_na(data):
  pass
# feature engineering

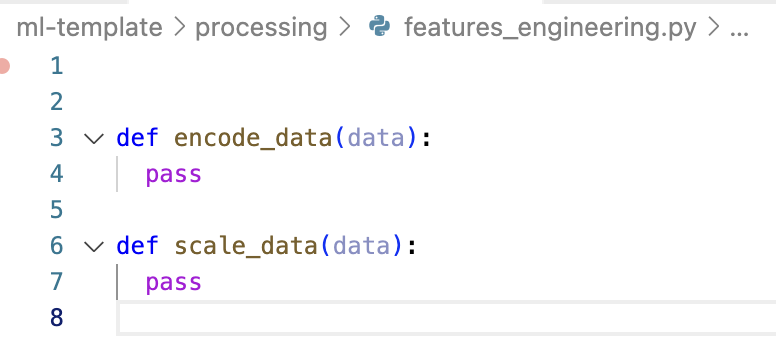
def encode_data(data):
  pass

def scale_data(data):
  pass
# modelling
def setup_params():
  pass

def build_model(params):
  pass
# training

def split_data(data):
  pass


def train_model(model, train_data):
  pass
# predict

def predict(model, data_to_predict):
  pass
Then, you may call above functions to run the experiments
# import libraries
import pandas as pd
# load data
data = pd.read_csv('dog_vs_cat.csv')
# preprocess
data = remove_noise(data)
data = fill_na(data)

# feature engineering
data = encode_data(data)
data = scale_data(data)

# split data
X_train, y_train, X_test, y_test = split_data(data)
# train model

# set up
params = setup_params()
model = build_model(params)

# train
model = train_model(model=model, train_data=(X_train, y_train))
After training, we may use the trained_model to predict an outcome
First, we want to test on the “test_data” that we have split
# validate the test data
test_outcomes = predict(model, data_to_predict=(X_test, y_test))
Then, we will you data comming from real world to see how the model reacts Note that, this data comming from real world HAVE NOT BEEN PROCESSED yet. So we need to use functions in “preprocess” step
real_data = pd.read_csv('real_dogcat_data.csv')

# We have to PREPROCESS this data (as what we have done with training data)
# preprocess
real_data = remove_noise(real_data)
real_data = fill_na(real_data)

# feature engineering
real_data = encode_data(real_data)
real_data = scale_data(real_data)

# (this is real data, we do not need to split them)
Finally, we use predict function to see the outcomes
outcomes = predict(model, real_data)
To engineering in VSCode
The above steps you may run serveral times, and “tune” to have a “good enough” model. After that, you may wish to “bring” your model into an application
To do this, we have to “engineering” the codes above
“Engineering” process is to arrange the above code in structure. A structure is something like a folder structure in your computer. Technically, we will transform “.ipynb” to “.py” file
What to arrange? We arrange the functions
How to arrange? There are many ways
- the most basic one is to leverage the above ML process, functions in the same steps will be in the same folder
- another way is to arrange by their functionalities
In the general process, we have these 2 steps:
- Preprocess:
fill_na,remove_noise - Feature Engineering:
encode_data,scale_data
These functions generally handle data, so we can group them into something called processing
Next, we have this step
- Modelling:
setup_params,build_modelThese functions are to build the model, so we can group them into models
Finally, we have 2 final steps:
- Training:
split_data,train_model - Predict:
predict
These functions are to support the process of training, testing, spliting data, predicting, so we can group them into utils
As a result, our “structure” will be
- processing: includes preprocess, and feature engineering
- models: setup params, build model
- utils: training and predict
Each “structure” will have “steps”, these “steps” can be generalized as “.py” files. Each “step” have functions, these functions will be written in the corresponding “.py” files
Below is the resulted structure
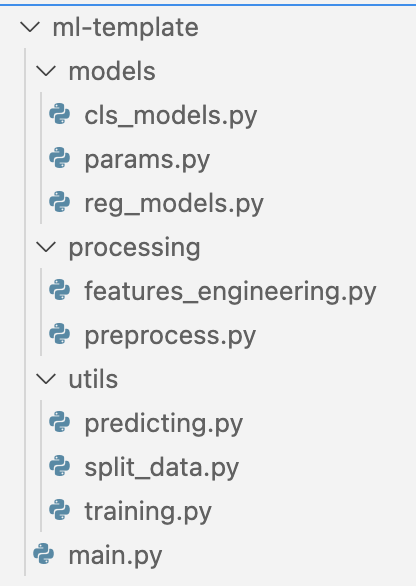
In the folder models, we can be more specific to create two cls_models.py and reg_models.py representing “classification models” and “regression models”. (It’s up to you)
In the root, we have main.py as the “entry” file. “Entry” file is something containing “main code” to run. Something like this (the cell in the notebook)

Here, we start to “bring” the code in the notebook to the corresponding “folder” in the “structure”. As a result, we will have
In the preprocessing > feature_engineering.py
In the processing > preprocess.py
In the models > params.py

In the models > cls_models.py
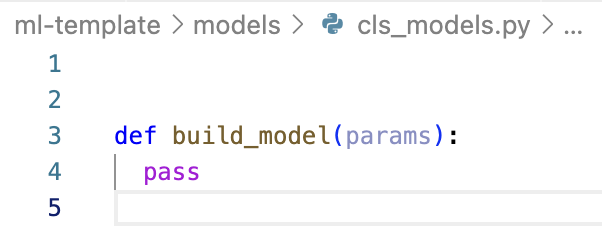
In the utils > split_data.py
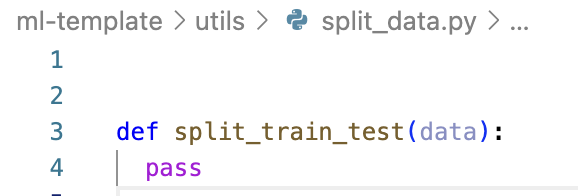
In the utils > training.py

In the utils > predicting.py
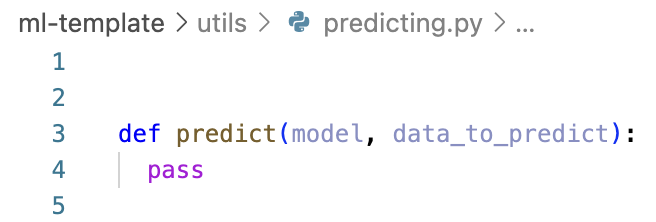
In the main.py, we have
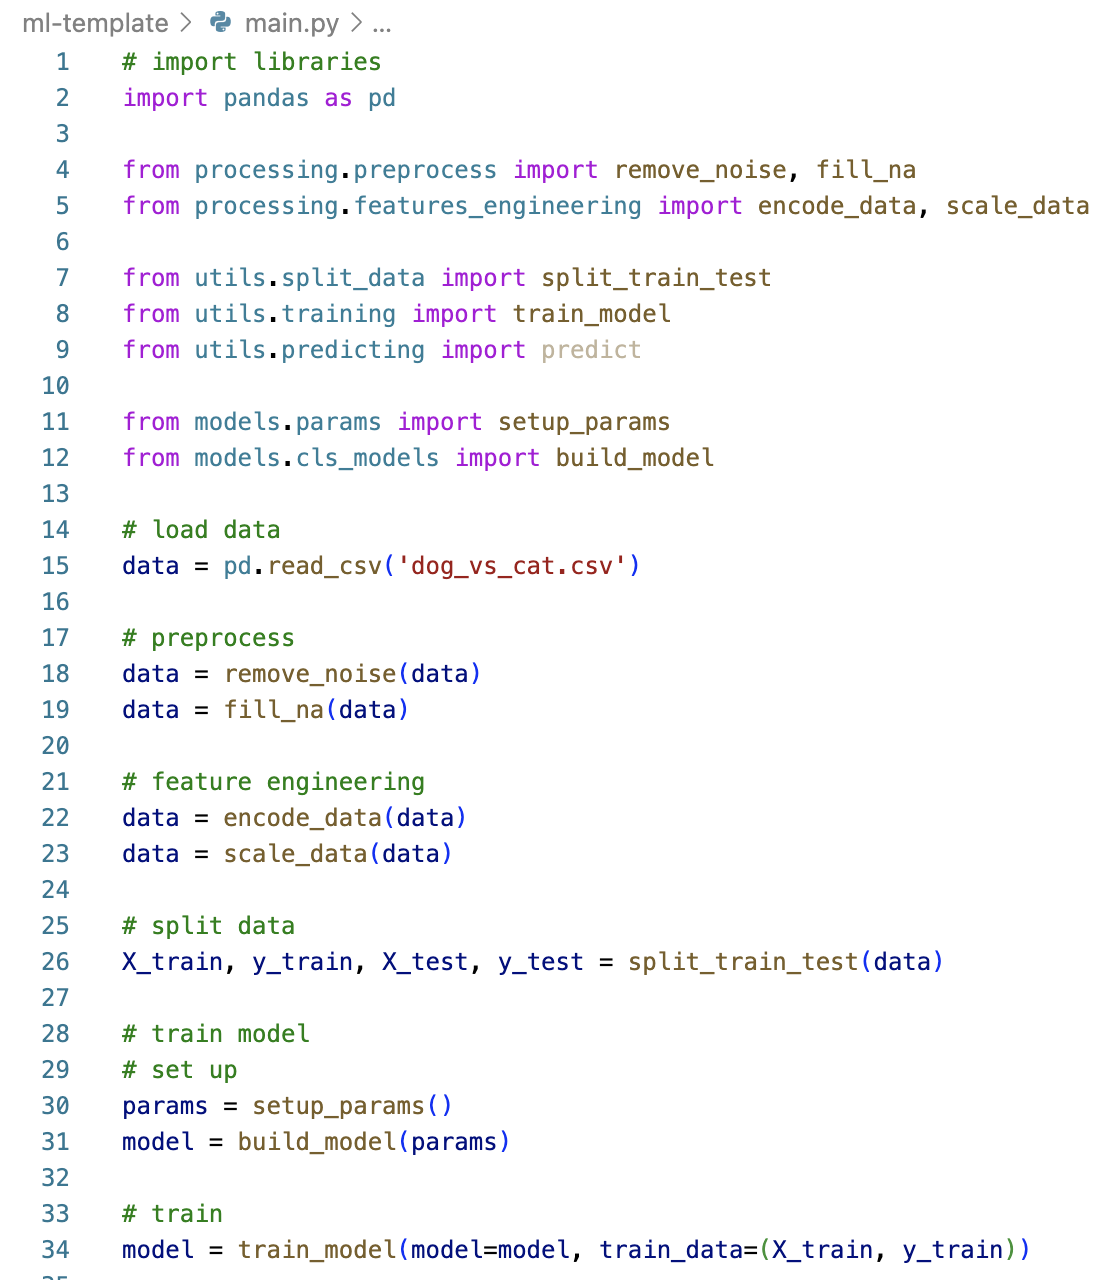
Different to notebook which all functions are in the same notebook, functions in engineering are seperated in many “.py” files, so we need to import them

Wrap up
A simple workflow of ML process

Experiment in notebook
- Each “step” includes many “actions”
- These “actions” are generalized as “functions”
- In notebook, all functions are in the same notebook (.ipynb files)
Engineering in VSCode
- Convert notebook “.ipynb” into many “.py” files in a structure
- A structure has “folders” are group of “steps”
- Each “step” is a “.py” files
- Each “.py” file contains many “functions”
- Bring the “functions” in notebook into corresponding “.py” files
- A structure has “main.py” file as the “entry” file
- In the entry file, we can not directly call the functions, we need to “import” them from “.py” files in the structure
Demo
The repo can be found here
Enjoy Reading This Article?
Here are some more articles you might like to read next: