Beginner to git? This post is for you
Why git?
Have you ever modify on a same file, say, Google docs, with your college? It may have conflicts when all of you modify in the same line. Yes, that’s where git comes to rescue
Each time you and your colleges modify the file, the new version is created, we need to control it. Yes, that’s where git comes to rescue
-> Git is a solution for version control

- Dot represents the file at that time
-
Line connecting the dots represents the worflow of the file
- Line of GREEN dots is the “main” workflow
- Line of BLUE dots is “your” workflow: when you modify the “main” workflow, you just PULL the “main” workflow to create your own workflow
-
Line of ORANGE dots is “your college” workflow: same as you when he or she modify the “main”, he or she may PULL the “main” workflow to create his or her workflow
- After completing modifcation, you MERGE it to the “main” workflow (BLUE line merges to GREEN line)
- After completing modification, your college MERGES it to the “main” workflow (ORANGE line merges to GREEN line)
- At the “main” worflow (GREEN line), it will be automatically aggregated from “your” and “your college” workflow
That’s how GIT work
So, where is the “main” workflow? It comes from a shared place specifically for code (just something like Google Drive or One Drive). Some popular services are Github, Gitlab
Where is “your” worflow? It’s on your personal computer. The same for “your college” worflow. It’s on his or her computer.
You can see that the above process requires two things: PULL and MERGE
- PULL: get the file from “main” worflow to your computer
- MERGE: contains 2 steps: PUSH the file on your computer to the shared place (“main” workflow), and, MERGE means updating the “main” file. (Because you have modified the file, it needs to be merged to the current “main” file)
Below is the demonstration of a simple file

In summary, we have 2 sides: the shared place and the workplace on your computer
- The shared place is called REMOTE
- The workplace of yours is called LOCAL

In the LOCAL, it is divided into 3 states:
- Working directory: where you are coding (e.g. VSCode), this place will NOT AFFECT the change of “your work”
- Staging: a “temperory” place to “index” the change of your working directory. This place will AFFECT the change of “your work”
- Local repository: your “workplace”, you will PUSH your work from here to the REMOTE
The REMOTE is the shared place, it can be placed on any familiar platform, two popular ones are Github and Gitlab. Its official name is repository, or (repo in short)
Now supose your repo already existed and you are assigned to work together with your team on it.
- To “get” the code from repo to the local, use git pull command
- Then, you will modify the code on the Working directory, when you finish, you need to “update” it to the repo by $3$ steps:
- Add what changes you want to the staging using git add command
- Move it to the local and ready for the repo&& by using **git commit command
- Officially push to the repo by using git push command
Summary
-
Repo is the remote place to storing code on. Some popular providers are Github, Gitlab
-
Local is your workplace on your computer
- git pull: get the code from repo to local
- git add: add changes from what you have modified to the staging
- git commit: confirm those changes that be ready to share on repo
- git push: officially push tose changes to the repo
Git in practice
- Initialize the repo from existing work
- Communicate with git when working
Initialize the repo from existing work
Suppose you have an existing work, and want to intialize a shared place on Github

In the termnial,
- Initialize git by using git init commands. This will setup a local repository

-
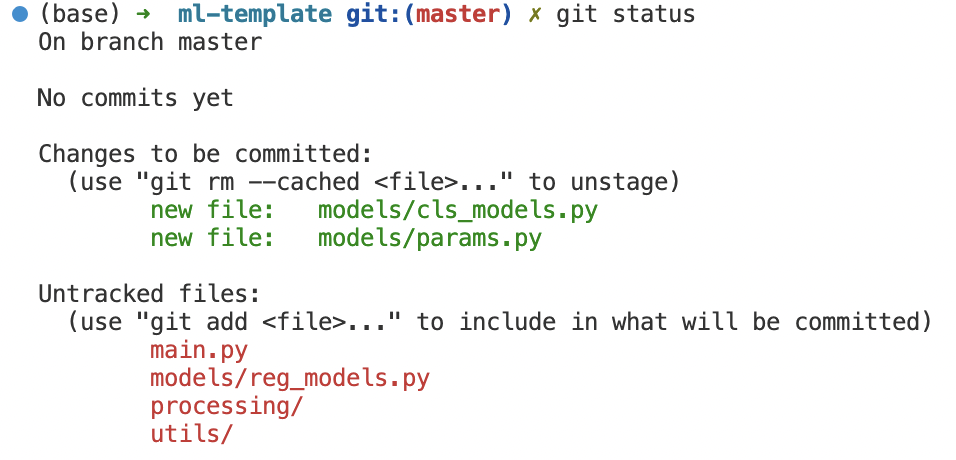
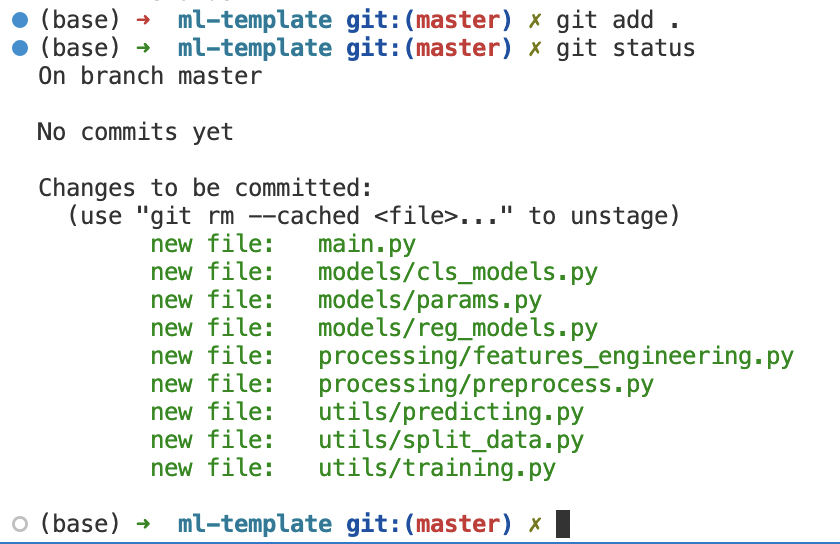
Add changes you want by using git add <files or folders>. If you want to add *all changes, simply use **git add .
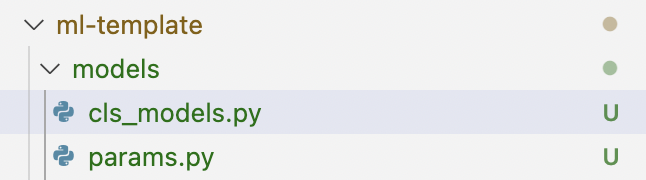
- Option 1: If you want to add, e.g. these files, add these path using git add, you can verify the added changes by using git status, which are in green

</figure>
<!--  -->
<figure>

</figure>
<!--  -->
<figure>

</figure>
* Option 2: If you want to add all files, use **git add .**, then use **git status** to verify, all files are in green
<!--  -->
<figure>

</figure>
-
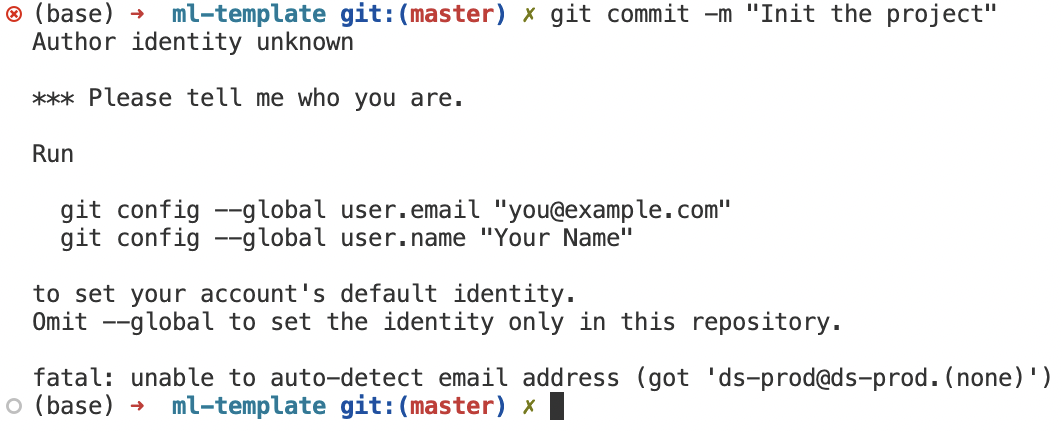
To confirm those changes will be push to remote repo, use commands git commit -m <your note or comments>

</figure>
If the above error occurs, that means you haven't clarify yourself, then add your user name and email by using those commands. Note that only add the "--global" if you are using your personal device, if you are on a shared server, it is better to remove it.
<!--  -->
<figure>

</figure>
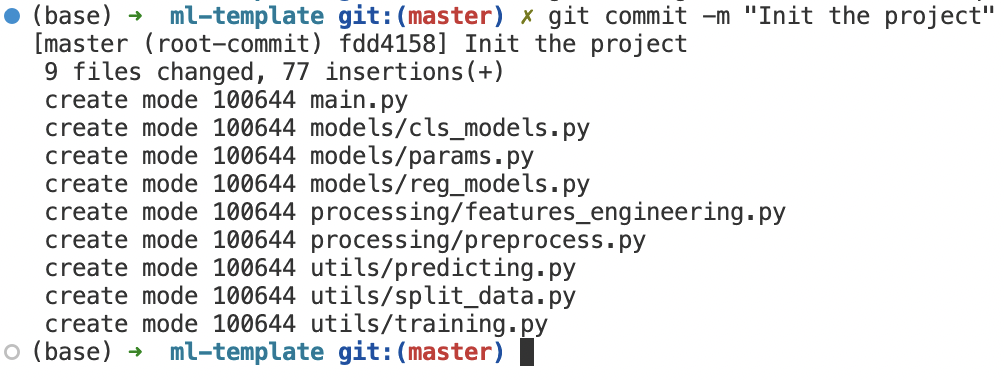
Then, use **git commit** again. Git will tell you all files are confirmed
<!--  -->
<figure>

</figure>
-
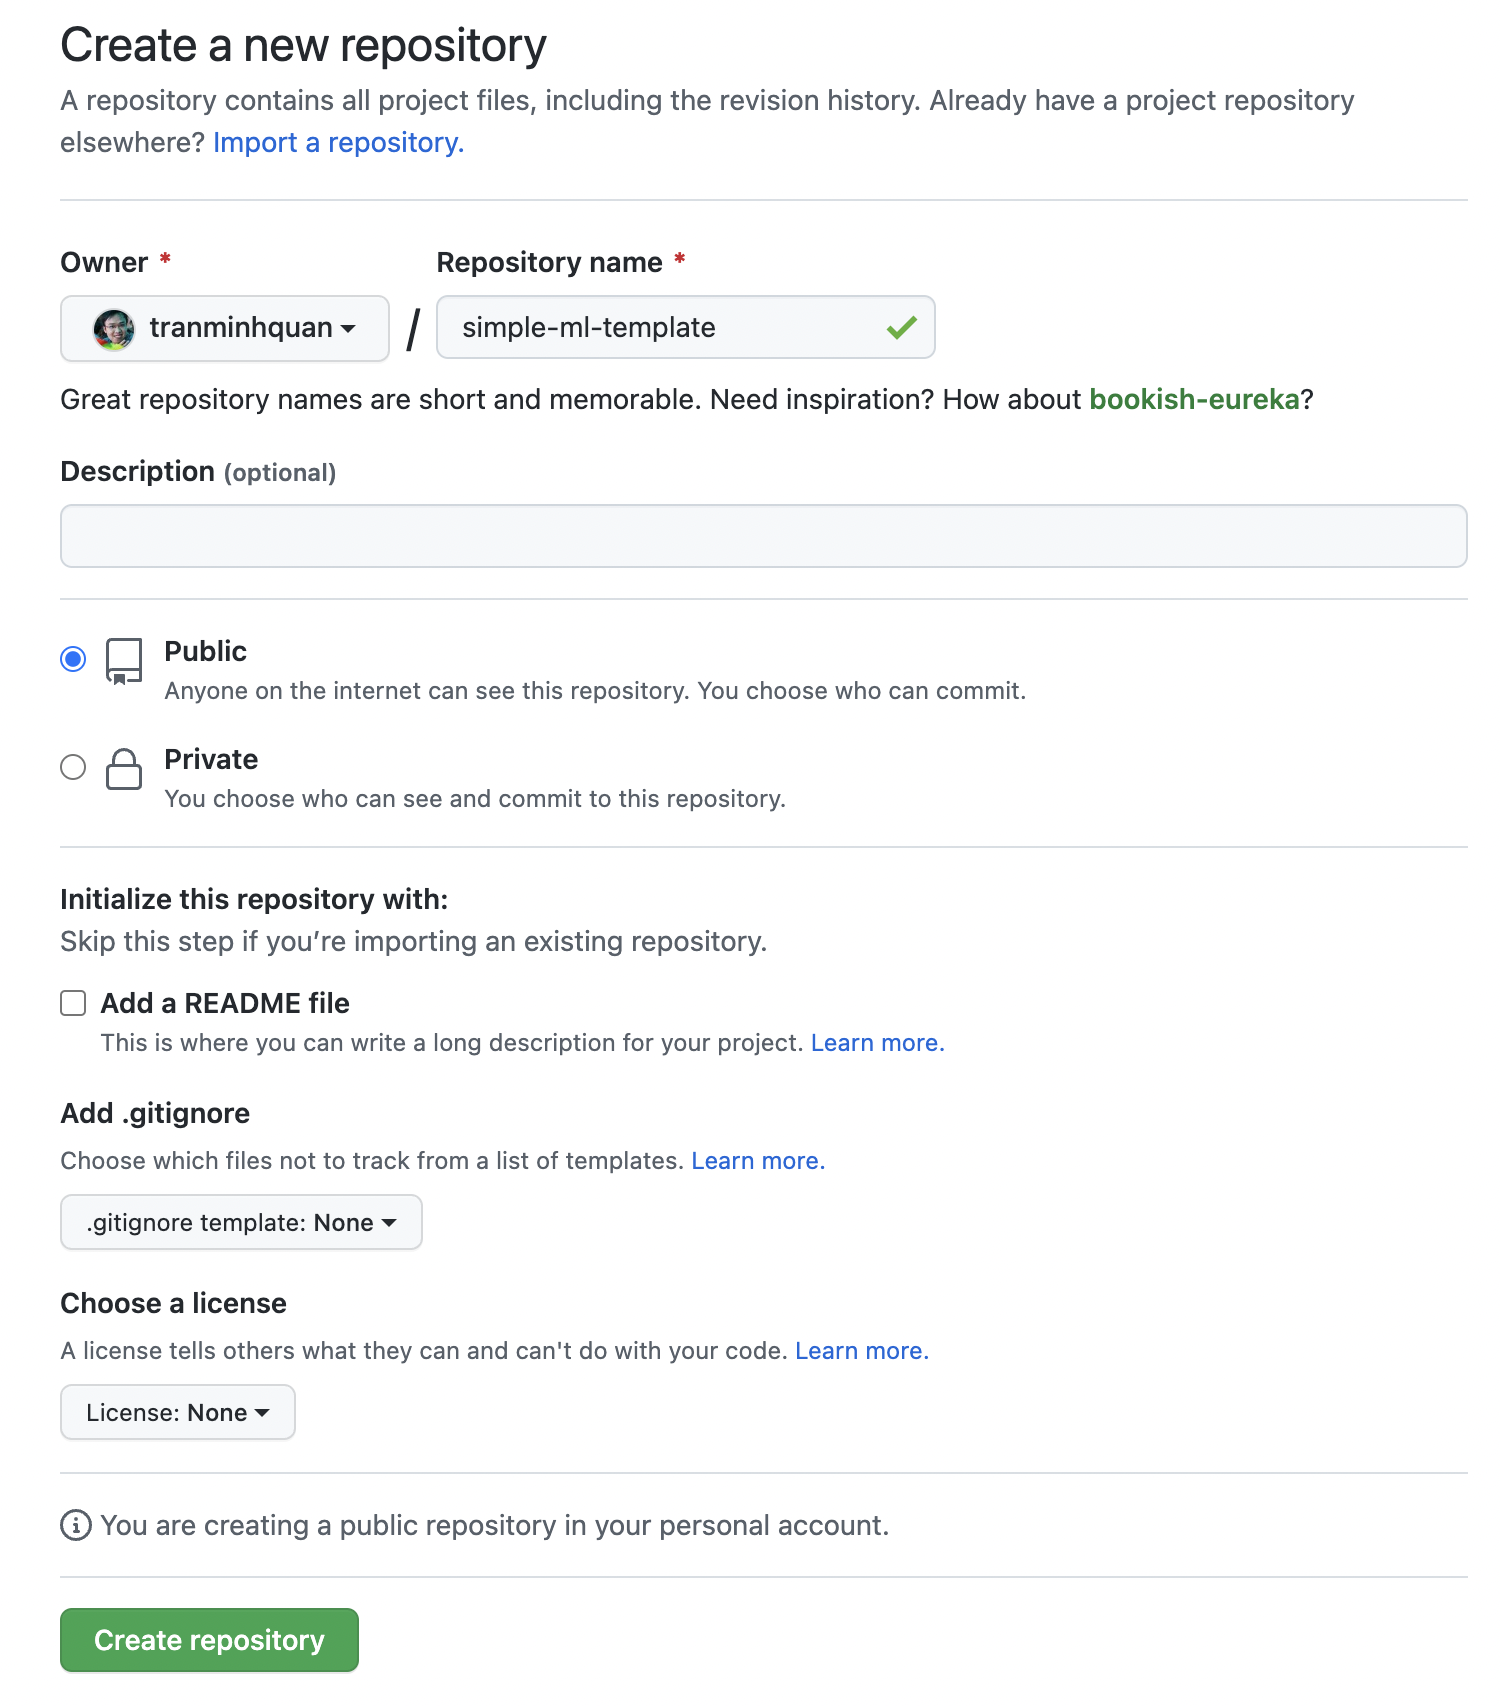
To officially push those changes to remote repo, you git push. However, you do not have a remote repo at this time. So, first, create a repo on Github

</figure>
You will see a https url of your repo, copy it. Back to the terminal, use **git remote add origin** */< https url />* to connect with the above repo
<!--  -->
<figure>

</figure>
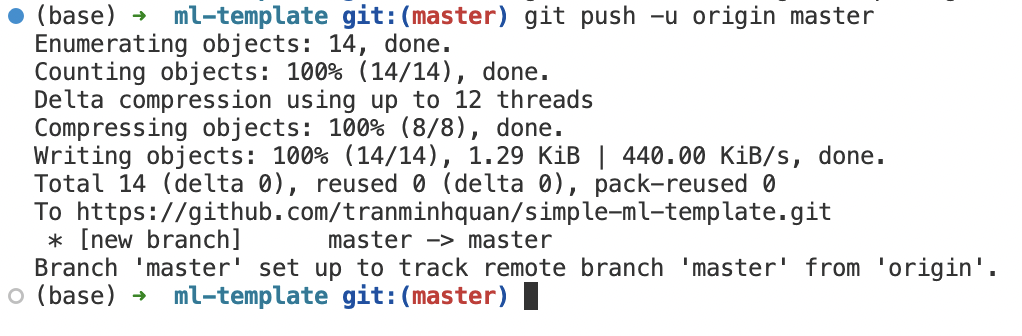
Officially push to the remote repo by using **git push -u origin master**
<!--  -->
<figure>

</figure>
Enjoy Reading This Article?
Here are some more articles you might like to read next: